

Fluke 719 100G Pressure Calibrator: A Comprehensive Guide
The Fluke 719 100G is an electric pressure calibrator, featuring a built-in electric pump for rapid testing.
It includes a product overview manual (printed) and a user manual on CD-ROM.
This guide details operation, ranging up to 100 psi (7 bar), and utilizes the 3345816 pump rebuild kit when needed.
The Fluke 719 100G Electric Pressure Calibrator represents a significant advancement in portable pressure calibration technology. Designed for technicians and engineers in the field, this instrument combines accuracy, versatility, and ease of use into a robust package. It’s a cornerstone tool for calibrating and testing a wide array of pressure devices, streamlining workflows and enhancing reliability.
This calibrator distinguishes itself with its integrated electric pump, eliminating the need for external pressure sources in many applications. The 100 psi (7 bar) range caters to numerous industrial processes. Included with the 719 100G are essential accessories like the TL75 hose and a protective holster, ensuring immediate usability.
Comprehensive documentation accompanies the device, including a printed product overview manual and a detailed user manual provided on CD-ROM. These resources guide users through every aspect of operation, from basic setup to advanced calibration procedures. The 719 series is supported by supplemental materials, like Change 1 (48042 and 49682), offering updates to pressure sensor input tables and DC mA measurement specifications.
Key Features and Specifications
The Fluke 719 100G boasts several key features enhancing its utility. Its internal electric pump generates up to 30 psi in under 15 seconds, significantly accelerating calibration processes. Accuracy is paramount, offering 0.025% of range (6-month calibration) or 0.035% (1-year calibration) for the 30G model, and similar precision for the 100G.
Regarding specifications, the Fluke 719 100G covers a pressure range of -12 to 120 psi. Resolution is a precise 0.001 psi. It also incorporates electrical measurement capabilities, specifically 0 to 24 mA DC current measurement and sourcing.
The calibrator supports external pressure modules, expanding its range and application possibilities, as detailed in Table 5 of the user manual. Compatibility with the 700 P00 module is noted. Furthermore, the 719 series benefits from optional accessories like the 71X Series Calibration Manual (686540) and the 719 Pump Rebuild Kit (3345816), ensuring longevity and continued performance.
Understanding the Display and Interface

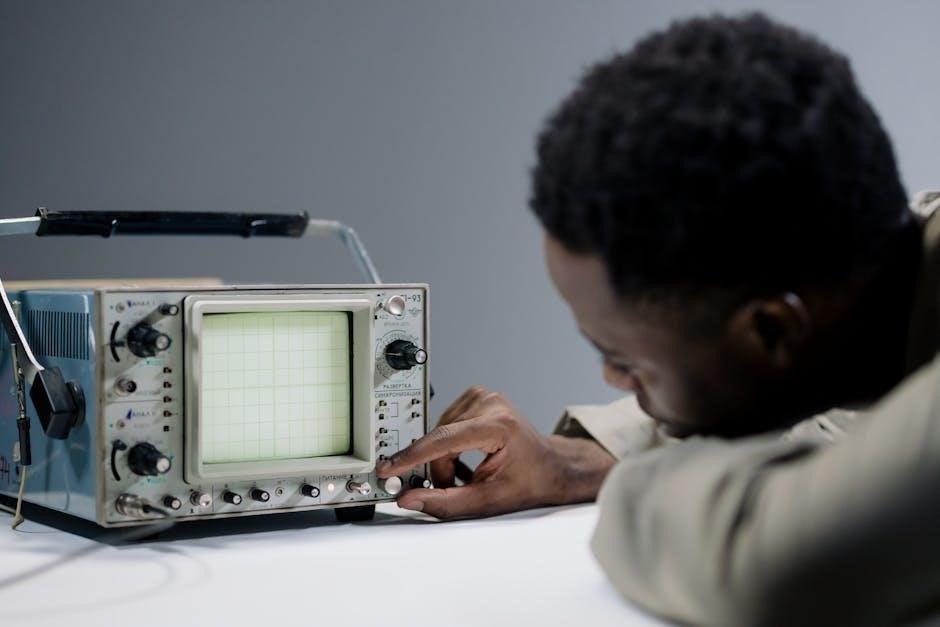
The Fluke 719 100G features a dual-display interface designed for clear and efficient operation. The upper display indicates the source value, while the lower display shows the measured value. For the 100G model, the upper display should read 100 upon initial startup, confirming proper functionality.
The interface incorporates intuitive buttons for navigating menus and adjusting settings. Users can easily switch between pressure measurement modes, electrical measurements, and pump control. The manual details each button’s function and menu structure.
Understanding the display’s units is crucial; the calibrator supports various pressure units (psi, bar, etc.). The interface also provides visual cues, such as indicators for pump status and measurement stability. The included quick start guide and comprehensive user manual (available on CD-ROM and in print) offer detailed explanations of all display elements and interface controls, ensuring users can maximize the instrument’s capabilities.
Powering On and Basic Operation
To power on the Fluke 719 100G, simply press the power button. The unit performs a self-test upon startup, briefly displaying firmware and model information. The manual recommends verifying the upper display shows “100” for the 100G model, confirming correct operation.
Basic operation involves selecting the desired measurement mode – pressure sourcing, pressure measurement, or mA measurement. Use the arrow keys to navigate the menu and the enter button to confirm selections. The interface is designed for intuitive control, as detailed in the included quick start guide.
Connecting a pressure source or device under test is straightforward using the TL75 hose. The manual provides clear instructions on proper connection techniques. Remember to consult the safety precautions before operation. The calibrator is ready for calibration and testing once powered on and configured, offering a streamlined workflow for technicians.
Pressure Measurement Modes
The Fluke 719 100G offers versatile pressure measurement modes, accommodating various applications. It can measure pressure directly using the internal pump or accept input from external pressure modules. The manual details how to switch between these modes using the front panel controls.
When measuring pressure, the display shows the current pressure reading with high resolution (0.001 psi for the 30G/100G models). The unit supports both positive and negative pressure measurements, expanding its utility. Accuracy is specified as 0.025% of range (6-month calibration) or 0.035% (1-year calibration), as outlined in the supplement.
The calibrator can also source pressure using the internal pump, allowing for leak testing and device validation. The manual provides guidance on setting the desired pressure and monitoring the output. Proper understanding of these modes, detailed in the user manual, is crucial for accurate and efficient calibration procedures.
Electrical Measurement Capabilities (mA)
Beyond pressure, the Fluke 719 100G excels in electrical measurements, specifically 4-20 mA loop testing. This functionality, detailed in the user manual, allows technicians to simultaneously measure and source mA, streamlining calibration processes for transmitters and other current loop devices.

The calibrator’s mA measurement range spans 0 to 24 mA, providing ample coverage for most industrial applications. It can accurately measure current draw, verify loop integrity, and troubleshoot wiring issues. The sourcing capability enables simulating process signals, verifying instrument response, and performing loop checks without a separate signal generator.
The manual emphasizes the importance of proper lead connections for accurate mA measurements. The 719’s internal pump can be used in conjunction with mA measurements to simulate process changes and observe instrument behavior. Refer to the supplement for specific table details regarding pressure sensor input and mA measurement/sourcing.

Using the Internal Electric Pump
The Fluke 719 100G’s integrated electric pump is a core feature, detailed extensively in the user manual. This pump allows for generating pressure without an external source, significantly enhancing portability and convenience. It can pump to 30 psi in under 15 seconds, facilitating rapid testing and calibration cycles.
The manual outlines procedures for both increasing and decreasing pressure using the pump’s controls. Users can select from various pressure units (psi, bar, etc.) to match the application. The pump’s performance is affected by fluid type and temperature, so the manual recommends considering these factors for optimal accuracy.
For the 719 100G model, the upper display should indicate 100 psi when the pump is operating at its maximum capacity. Regular maintenance, including potential pump rebuilds using kit 3345816, ensures continued reliable operation, as described within the comprehensive documentation.
Connecting External Pressure Modules
The Fluke 719 series, including the 100G model, supports expanding pressure ranges via external pressure modules, a process thoroughly explained in the user manual. These modules connect directly to the calibrator, broadening its capabilities beyond the internal pump’s 30 psi limit.
Table 5 in the manual details recommended pressure modules for both the 719 30G and 719 100G. Selecting the appropriate module depends on the required pressure range and accuracy for the specific application. The manual emphasizes ensuring a secure and leak-free connection.
When using external modules, the Fluke 719 automatically recognizes the module’s range, adjusting the display accordingly. Calibration procedures outlined in the manual must be followed when integrating external modules to maintain measurement accuracy. Proper module selection and connection are crucial for reliable results.
Fluke 719 100G Pressure Ranges and Accuracy
The Fluke 719 100G boasts a pressure range of -12 to 120 psi, offering versatility for various calibration tasks, as detailed in the user manual. Its resolution is 0.001 psi, ensuring precise measurements. Accuracy is specified as 0.025% of range for 6-month calibrations and 0.035% of range for 1-year calibrations.
The manual highlights that accuracy specifications are based on non-destructive pressure limits. Exceeding these limits can compromise the calibrator’s performance. When utilizing external pressure modules, the overall system accuracy is influenced by both the Fluke 719 and the module’s specifications.

Understanding these ranges and accuracy levels is critical for interpreting measurement results correctly. The manual provides comprehensive guidance on verifying accuracy through calibration procedures. Regular calibration, as recommended in the manual, maintains the Fluke 719 100G’s precision and reliability.
Calibration Procedures – Overview
The Fluke 719 series manual, specifically the 71X Series Calibration Manual (686540), details comprehensive calibration procedures. These procedures ensure the Fluke 719 100G maintains its specified accuracy. Regular calibration, as outlined in the manual, is crucial for reliable performance.
The manual emphasizes a multi-step process, beginning with visual inspection and progressing to functional testing. This includes verifying pressure readings against a known standard. The manual provides guidance on selecting appropriate calibration standards and documenting results meticulously.
Users should consult the manual for specific instructions on calibrating both the internal pump and any connected external pressure modules. The manual also details procedures for electrical measurements (mA), ensuring comprehensive calibration. Following the manual’s guidelines guarantees traceable and accurate calibration results, maximizing the Fluke 719 100G’s utility.
Recommended Pressure Modules for 719 30G/100G
The Fluke 719 series user manual, specifically Table 5, outlines recommended pressure modules for both the 719 30G and 719 100G calibrators. These modules expand the instrument’s pressure measurement capabilities beyond the internal pump’s range.
For the 719 30G/100G, the 700 P00 module is frequently recommended. The manual details compatibility and optimal usage scenarios for each module. Selecting the appropriate module depends on the specific application and required pressure range.
The manual emphasizes that using recommended modules ensures accuracy and traceability. It provides detailed specifications for each module, including range, resolution, and accuracy. Proper module selection, as guided by the manual, is vital for achieving reliable calibration results. Always refer to the manual for the latest recommendations and compatibility information.
Troubleshooting Common Issues
The Fluke 719 user manual addresses several common issues. If the display shows inaccurate readings, verify the selected pressure range and ensure proper module connection. A “low battery” indication requires immediate charging or battery replacement, as detailed in the manual.
If the internal pump fails to pressurize, check the pump connections and ensure the pump hose isn’t kinked or blocked. The manual outlines pump rebuild procedures using kit 3345816 for more significant pump failures. Electrical measurement inaccuracies (mA) should prompt a check of the test lead connections and calibration status.
For communication errors, consult the manual’s section on data logging and interface settings. If the unit fails to power on, verify the power adapter and fuse. The manual provides a comprehensive troubleshooting guide, including safety precautions. Always refer to the manual before attempting any repairs or adjustments.
Maintenance and Cleaning
Regular maintenance, as outlined in the Fluke 719 user manual, ensures optimal performance and longevity. Periodically inspect the test leads and hoses for damage, replacing them as needed. Clean the exterior of the calibrator with a damp cloth, avoiding harsh chemicals or solvents. The manual emphasizes keeping the pressure connections clean and free of debris;
For the internal pump, the manual recommends periodic rebuilds using kit 3345816, especially with frequent use; This maintains accurate pressure generation. Inspect the display for clarity and ensure all buttons function correctly. The manual details calibration procedures to verify accuracy.
Store the Fluke 719 in a dry, clean environment, protected from extreme temperatures and humidity. Refer to the manual for specific storage guidelines. Proper cleaning and maintenance, following the manual’s instructions, will minimize downtime and ensure reliable operation of your pressure calibrator.
Pump Rebuild Kit Information (3345816)
The Fluke 719’s internal electric pump, crucial for accurate pressure generation, benefits from periodic rebuilding. The Fluke pump rebuild kit, part number 3345816, provides all necessary components for this maintenance. The user manual details a step-by-step procedure for pump disassembly, cleaning, and reassembly using this kit.
Regular rebuilds, especially with frequent calibrator use, are recommended to maintain specified accuracy levels. The manual outlines the frequency based on usage intensity. The kit includes seals, diaphragms, and other wear items prone to degradation over time. Proper rebuilds, guided by the manual, restore the pump’s performance.
Always refer to the Fluke 719 user manual for detailed instructions and safety precautions during the rebuild process. Using the correct kit (3345816) and following the manual’s guidance ensures a successful pump restoration, extending the calibrator’s lifespan and maintaining calibration integrity.
Accessing the User Manual (CD-ROM & Print)
Fluke provides comprehensive documentation for the 719 100G Pressure Calibrator in two formats: a printed product overview manual and a detailed user manual supplied on a CD-ROM. The printed manual offers a quick start guide and essential operational information, ideal for immediate reference in the field.

The CD-ROM contains the complete user manual, offering in-depth explanations of all features, functions, troubleshooting steps, and calibration procedures. This digital version allows for easy searching and printing of specific sections. Ensure you have a compatible computer with a CD-ROM drive to access the digital manual.
Both manuals are crucial for understanding the 719 100G’s capabilities and ensuring accurate operation. The manual also details safety precautions and provides information on optional accessories. Regularly consulting the manual will maximize the calibrator’s performance and longevity.
Included Accessories (TL75 Hose, Holster)
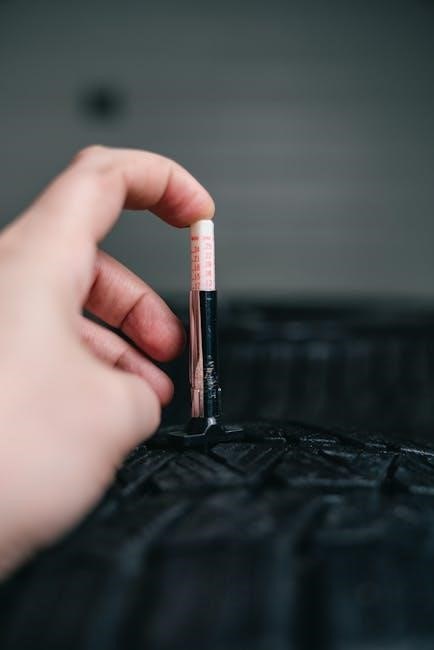
The Fluke 719 100G Pressure Calibrator package includes several essential accessories to facilitate immediate and effective use. A key component is the TL75 hose, designed for secure and reliable connection to pressure sources and devices under test. This hose is specifically chosen for compatibility with the calibrator’s pressure ports and ensures minimal leakage during operation.
Furthermore, a protective yellow holster is included, providing robust protection for the 719 100G during transport and field use. The holster safeguards the instrument against physical damage, dust, and moisture, extending its operational life. It also features convenient storage compartments for small accessories.
These included accessories enhance the 719 100G’s usability and portability. Refer to the user manual for detailed instructions on proper hose connection and holster usage to maximize their benefits and ensure safe operation.
Safety Precautions and Warnings
Prior to operating the Fluke 719 100G Pressure Calibrator, carefully review all safety precautions outlined in the user manual. High pressure can pose significant hazards; always ensure connections are secure and rated for the applied pressure. Never exceed the maximum pressure rating of the calibrator or connected devices – 100 psi (7 bar) for the 100G model;
Exercise caution when working with pressurized fluids, as they can cause injury if released unexpectedly. Wear appropriate personal protective equipment, including safety glasses and gloves. Avoid exposing the calibrator to extreme temperatures or corrosive environments.
The internal pump generates pressure; do not disassemble or modify it. Only qualified personnel should perform maintenance or repairs, utilizing the 3345816 pump rebuild kit when necessary. Disconnect power before cleaning or inspecting the instrument. Failure to adhere to these warnings may result in damage to the equipment or personal injury.
Optional Accessories and Upgrades
Enhance the functionality of your Fluke 719 100G Pressure Calibrator with a range of optional accessories. Recommended pressure modules, detailed in the manual (Table 5), expand pressure measurement capabilities beyond the internal pump’s range. Consider external pump options for specialized applications requiring higher pressures or specific fluids.
The 71X Series Calibration Manual (686540) provides advanced calibration procedures and techniques. For streamlined documentation, explore data logging software compatible with the 719 series. Protective carrying cases offer enhanced portability and protection during transport.
Upgrades, such as firmware updates, can improve performance and add new features. Regularly check the Fluke website for the latest updates and accessory offerings. Utilizing these options maximizes the versatility and precision of your Fluke 719 100G, ensuring accurate and reliable pressure calibration for diverse applications.
71X Series Calibration Manual (686540)
The Fluke 71X Series Calibration Manual (document number 686540) serves as a comprehensive resource for advanced users of the Fluke 719 100G and other models within the 71X series. This manual delves into detailed calibration procedures, exceeding the scope of the standard user manual included with the instrument.

It provides in-depth guidance on achieving traceable calibration results, outlining best practices for accuracy and precision. Users will find detailed explanations of calibration techniques, error analysis, and uncertainty calculations. The manual also covers specific calibration methods for various pressure sensors and transmitters.
Accessing this resource is crucial for maintaining calibration standards and ensuring the reliability of pressure measurements. It’s recommended for technicians and engineers responsible for calibration services or those requiring a thorough understanding of the Fluke 719 100G’s calibration capabilities. It complements the standard documentation, offering a deeper level of technical expertise.
Fluke 719 100G: Quick Start Guide
This Quick Start Guide for the Fluke 719 100G Pressure Calibrator provides essential steps for immediate operation. Begin by connecting the TL75 hose to the calibrator and the device under test. Power on the unit and allow it to warm up for optimal accuracy. The upper display should indicate 100 psi for the 100G model.
Utilize the pump function to generate pressure, observing the display for real-time readings. The internal pump can quickly reach pressures up to 30 psi in under 15 seconds. For higher pressures, consider compatible external pressure modules (refer to the full manual for recommendations).
The Fluke 719 100G also measures electrical signals, specifically 0 to 24 mA. Refer to the manual for detailed instructions on mA measurement and sourcing. Remember to consult the included instructions sheet (available in 14 languages) for basic operation and safety precautions before commencing calibration tasks.